2026-10-07
Wall push-ups: your feet are the resistance dial
The same wall can offer a different challenge. Learn how foot distance changes a wall push-up, then compare two comfortable setups without chasing more reps.
Tip Top Fitness · Exercise form · Guide 2
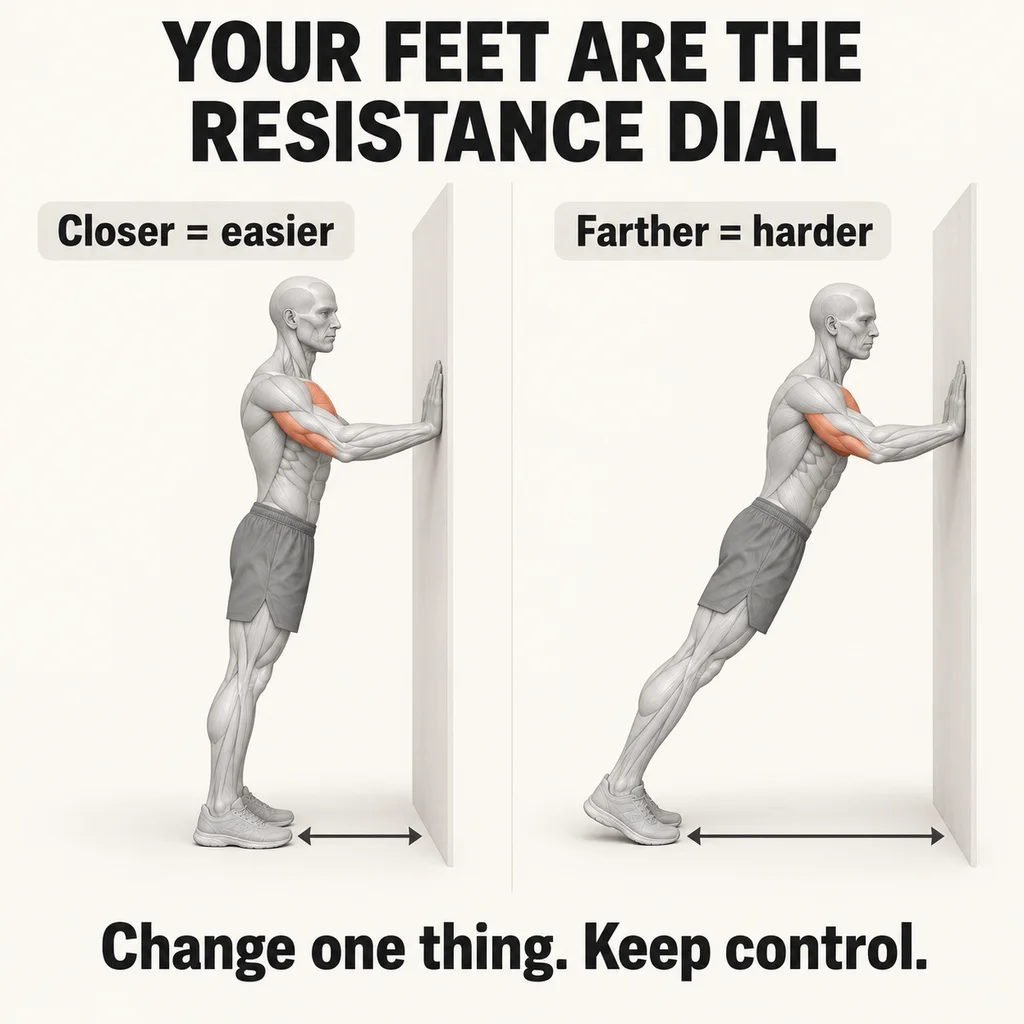
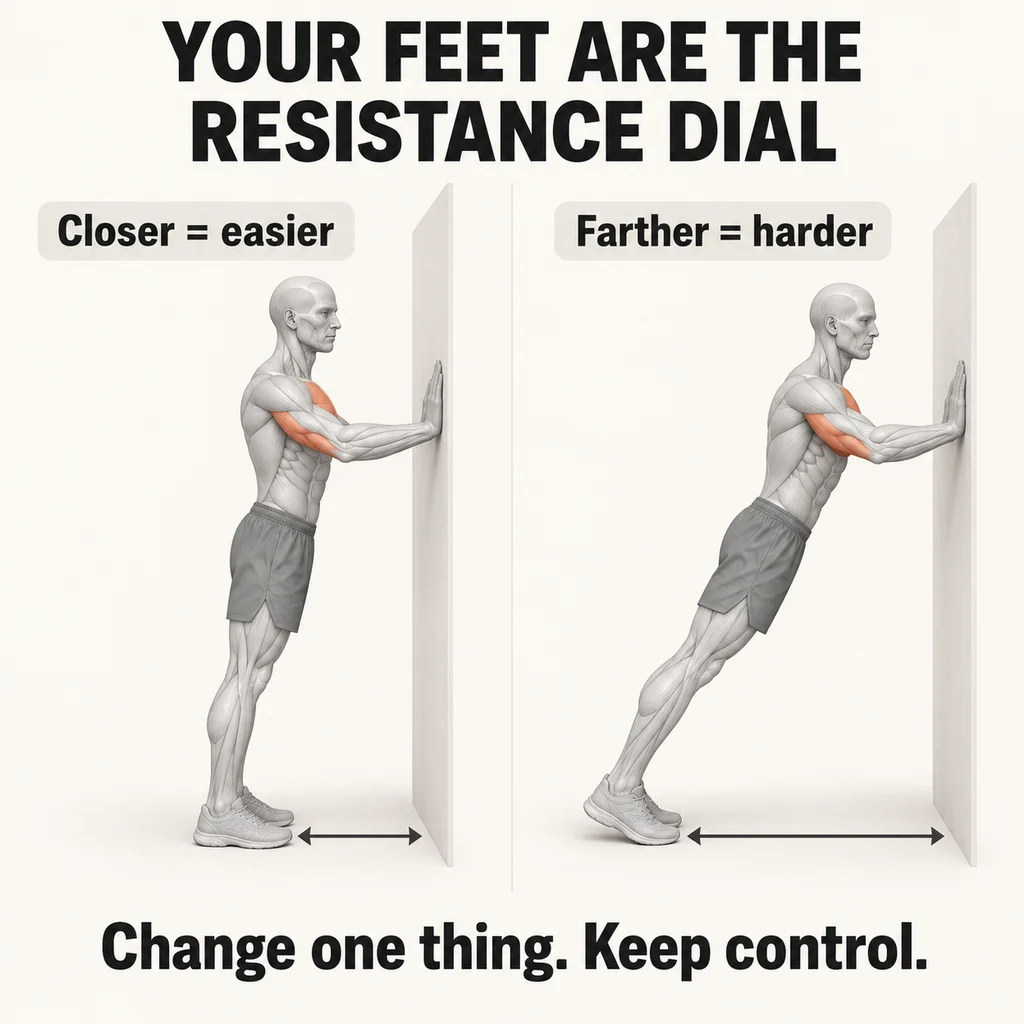
A wall push-up does not have one fixed difficulty. Your feet act like a resistance dial: a more upright setup is usually easier, while standing farther back makes the same wall more challenging. You can adjust the exercise before adding repetitions or buying equipment.
Why a small step matters
Changing your stance changes how far your body leans into the wall. Mersey Care NHS wall-press guidance specifically uses greater foot distance to increase difficulty. The useful idea is adjustable challenge—not a prescribed distance that everyone must use.
A primary study of push-up variations measured lower peak vertical hand forces in hands-elevated variations than in a standard floor push-up. It tested raised boxes, not wall foot distances. That supports the broader principle that setup changes loading; it does not give a wall-push-up percentage or an exact dose for you.
Set up a wall, not a window
Use a solid, unobstructed wall and a dry floor with reliable grip. Avoid glass, doors that can open, and surfaces your hands could slide on. Stand facing the wall with feet about hip-width apart. Place palms around shoulder height and shoulder-width apart. Choose a distance where you can reach comfortably without shrugging or arching your back.
Make one smooth repetition
Bend your elbows to bring your upper body toward the wall, then press back to your start. South Tees NHS demonstrates this bend-and-press sequence. Keep your head, trunk and hips moving together rather than sending only your face forward. Breathe throughout; do not force your nose or chest to touch the wall.
Use a comfortable elbow path rather than forcing elbows wide or tightly pinning them to your sides. A useful cue is “bring the whole body with you.” Finish with controlled arms, not a snap into the elbows. A shorter range is fine if it lets you stay steady and comfortable.
Try a two-position comparison
Only try this if wall push-ups are already comfortable and balance is reliable. Do two or three slow repetitions at an easy distance, then rest. Move your feet a small amount farther back and reposition your hands if needed for a comfortable reach. Repeat the same small number with a similar pace and range. This is a practice comparison, not a strength test or clinical assessment.
Ask: does this feel more demanding while staying equally controlled? If your back arches, hips stay behind, palms slip or movement becomes jerky, move closer again. You do not need to keep the harder version. If the difference is unclear, avoid taking bigger and bigger steps just to prove the point.
The easier option is an adjustment, not a failure
Move your feet closer to the wall and use a smaller comfortable bend. Change one thing at a time so you know what helped. Rather than comparing your repetition count with someone else’s, note your wall distance, comfortable range and control. “Ten wall push-ups” can describe quite different tasks.
When to stop
Stop for pain, dizziness, unusual symptoms, slipping or loss of balance. Do not work through wrist or shoulder discomfort to finish a target. If you have an injury, recent surgery or medical exercise restrictions, ask your treating clinician which version is appropriate before trying a general guide.
Save the useful part
Your takeaway: adjust the setup before chasing the count. Share the diagram with someone who thinks a wall push-up is either “too easy” or “not for me”—the position can be changed, and the right challenge is one you can control.
For a lower-body companion, try the chair-squat guide. For individual help, explore beginner training, strength training in Santa Barbara or training at home. Text Laurence using the button below about a $60 first full-hour session.